Columns
The Columns area picks the fields that become columns on the sheet, sets their order, and configures each one.
Add Columns
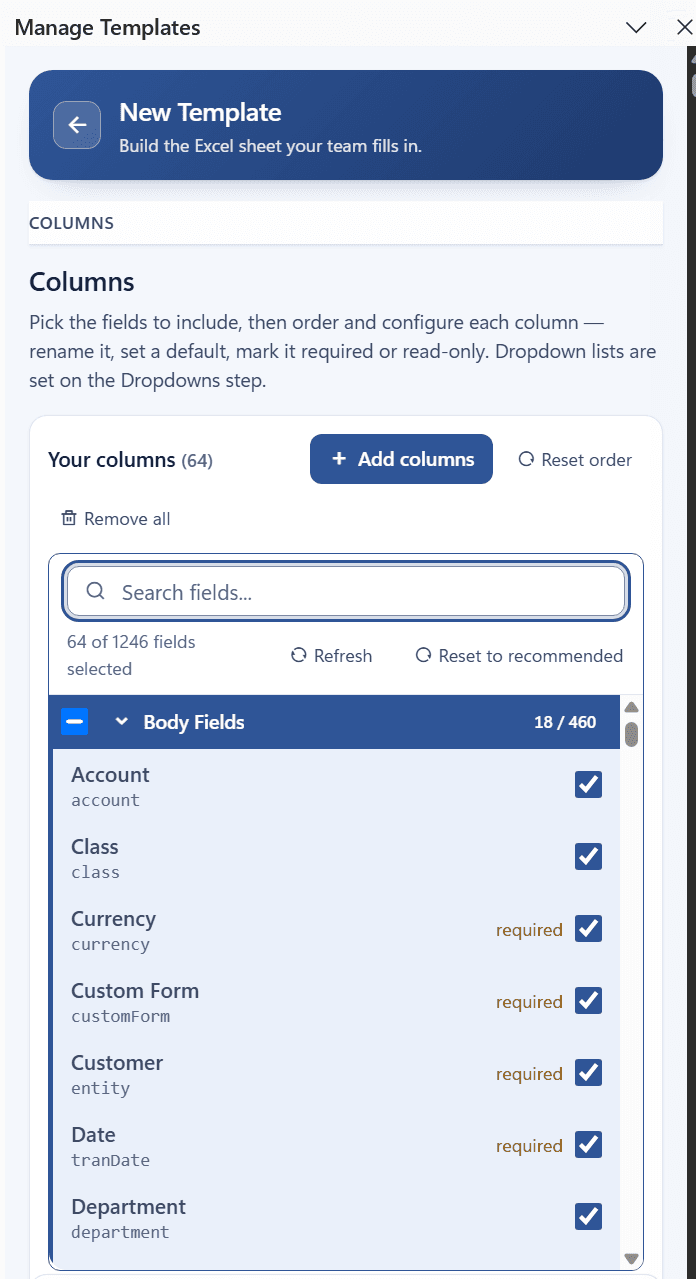
- Open the Add columns panel at the top of the area.
- Search with the Search fields... box or browse the groups. Header fields are listed under Body Fields and each sublist is listed under its own name, such as Items or Expenses. Each group has a select-all checkbox and a count of selected fields.
- Check each field you want as a column. Fields marked
requiredwere detected as required by NetSuite. Fields markednot on formare not on the selected custom form.
Remarks
- A new template starts with a recommended set of columns for its record type, unless Start with recommended columns was unchecked on Basics. Reset to recommended restores that set and its defaults. Refresh reloads the field list from NetSuite. Remove all clears the column list so you can pick every column yourself.
- Fields that belong to a subrecord, such as a billing address, are grouped under an expandable node. Use those individual fields (for example Billing Address: Zip Code) rather than the combined address field. A change to an individual field updates every related address field in NetSuite, while a change to the combined field does not.
- Custom fields and custom segments appear in the list like any other field. Custom segments automatically use the matching Finsyte segment list for their dropdown.
- Fields of a nested list, such as a line's inventory detail, are grouped under their own node, for example Inventory Assignment in the Items group. Selecting any of them adds an ID column for that list (such as Inventory Assignment: ID) automatically. See Inventory Detail for which fields to choose.
- You do not add Line ID columns. Every sheet gets one per sublist on the template (such as Items: Line ID) automatically. See Work With Lines.
- On forms that show Location on item lines, include the Location column of the Items group if the sheet will add or replace item lines. NetSuite requires it on new lines.
Order Columns
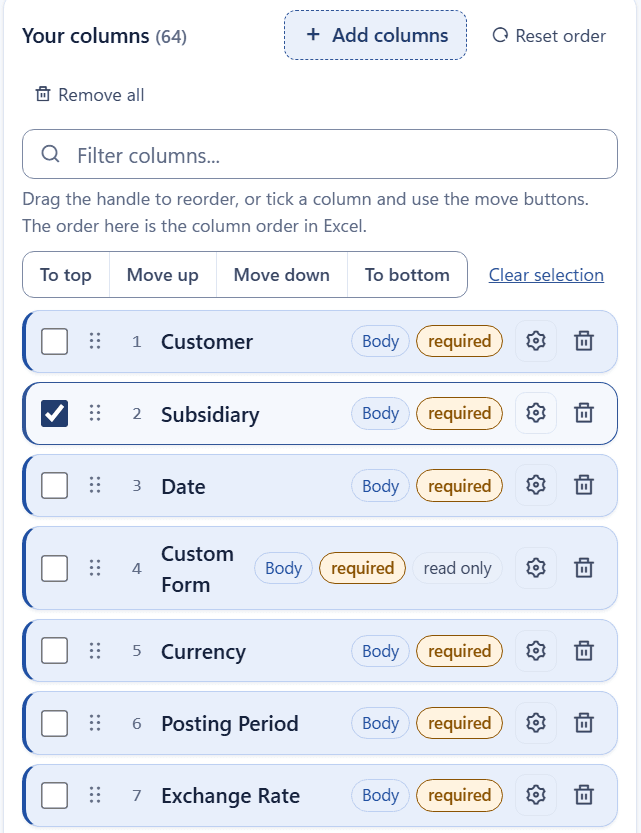
The Your columns list shows the selected fields in the order they will appear on the sheet, left to right. Drag a column by its handle, or check one or more columns and use To top, Move up, Move down, and To bottom. Reset order returns to the default order. Use the Filter columns... box to find a column in a long list.
Each row in the list shows badges for the column's group (Body or the sublist name) and its settings, such as required, read only, or = <default value>.
Configure a Column
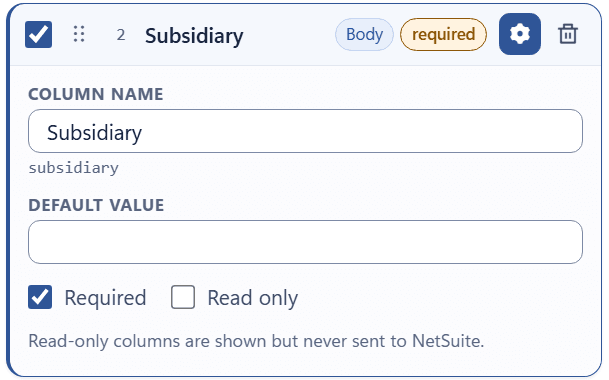
Select the gear icon on a column to open its settings.
| Setting | Effect on the sheet |
|---|---|
| Column name | The header text shown in Excel. The NetSuite field ID is shown beneath it for reference. |
| Default value | Used for any row where the cell is left blank at upload time. |
| Required | The header is shown in bold with an asterisk, and Validate Sheet flags blank cells. |
| Read only | The column is shown on the sheet but its values are never sent to NetSuite. Useful for reference information such as a document number or a total. |
Important: Finsyte marks a field as required when NetSuite's record definition, the selected custom form, or a built-in list of common fields says so. That can mark fields your NetSuite configuration does not actually require. Review the Required setting on each column against your own NetSuite setup and uncheck it where it does not apply. The setting affects only the header asterisk and Validate Sheet warnings; NetSuite decides what is required when you upload.
Tip: Read only is also the right choice for fields NetSuite fills in itself, such as totals, document numbers, or calculated dates. NetSuite may reject a record when one of these fields is sent, so marking the column read only lets you see the value on the sheet without it being included in the upload.
The trash icon on a column's row takes the column off the template.
Important: The column layout is fixed when a sheet is created. Changing columns here affects sheets created after you save, not sheets that already exist. See Keep Templates Up to Date.
Next step: Filters