Example: Invoices Start to Finish
This example builds an invoice template, creates two invoices from Excel, and then updates one of them a week later. It touches every step in this section.
Build the Template
- Select Templates and Actions > Record Edit > Bulk Records > Manage Templates.... The Manage Templates pane opens.
- Select New.
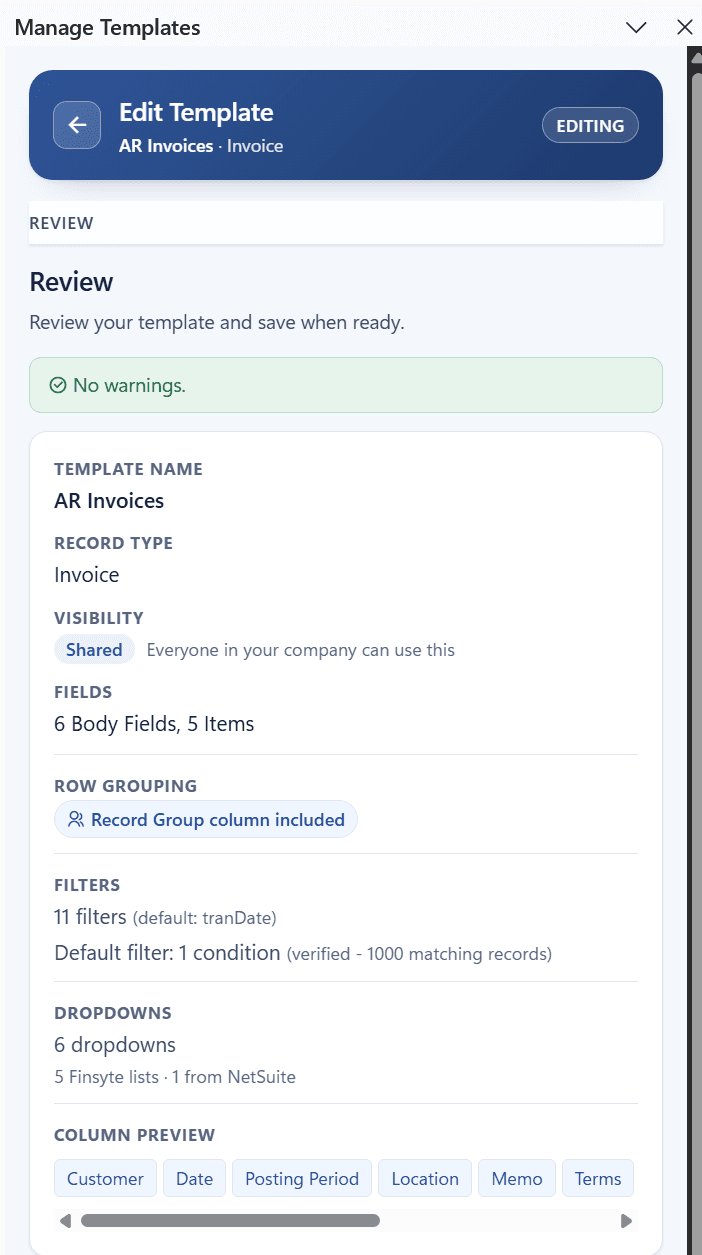
- On Basics, enter the name
AR Invoices, search for and select the Invoice record type, choose the custom form you use for invoices, choose Shared, and check Include row grouping column. Row grouping is optional; this example uses it. Select Columns.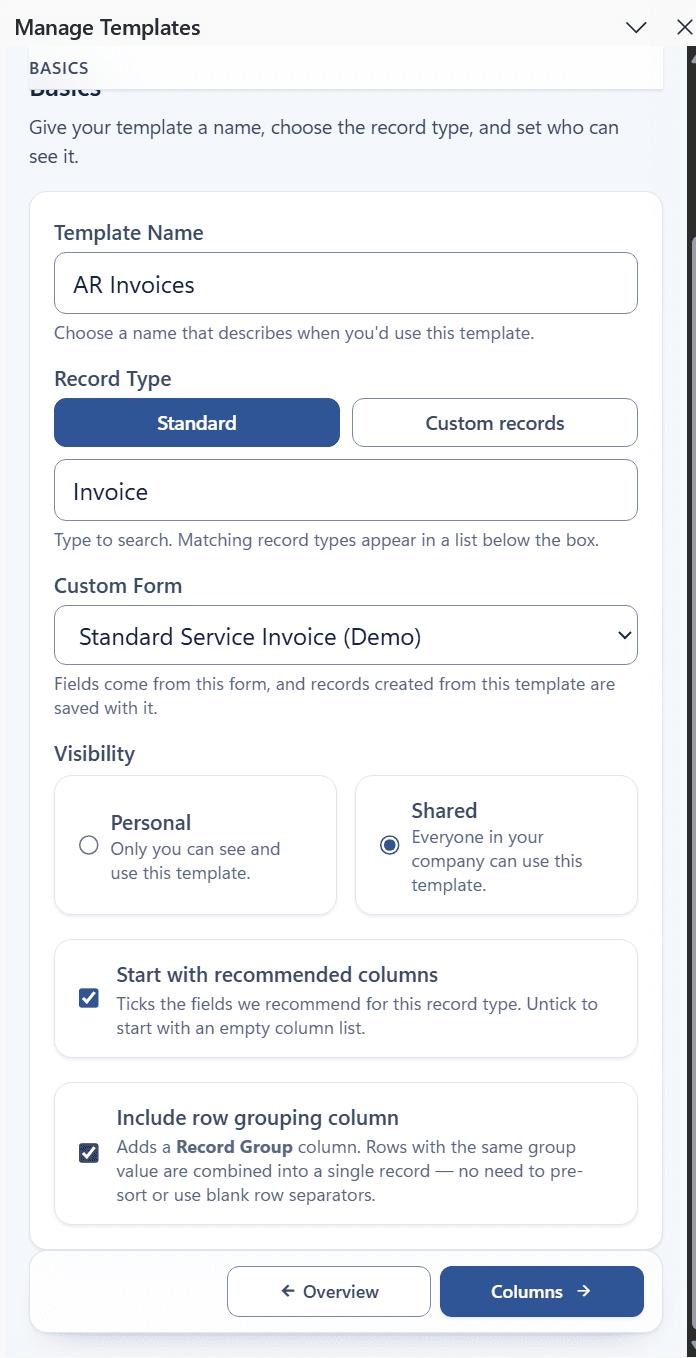
- On Columns, select Remove all to clear the recommended columns. Then select Add columns, search for each field, and check Customer, Date, Posting Period, Location, Memo, and Terms under Body Fields, and Item, Quantity, Rate, Amount, and Description under Items. Customer, Date, Posting Period, Location, and Item are marked
required. If Location lands at the end of the list, tick it and use Move up to place it after Posting Period.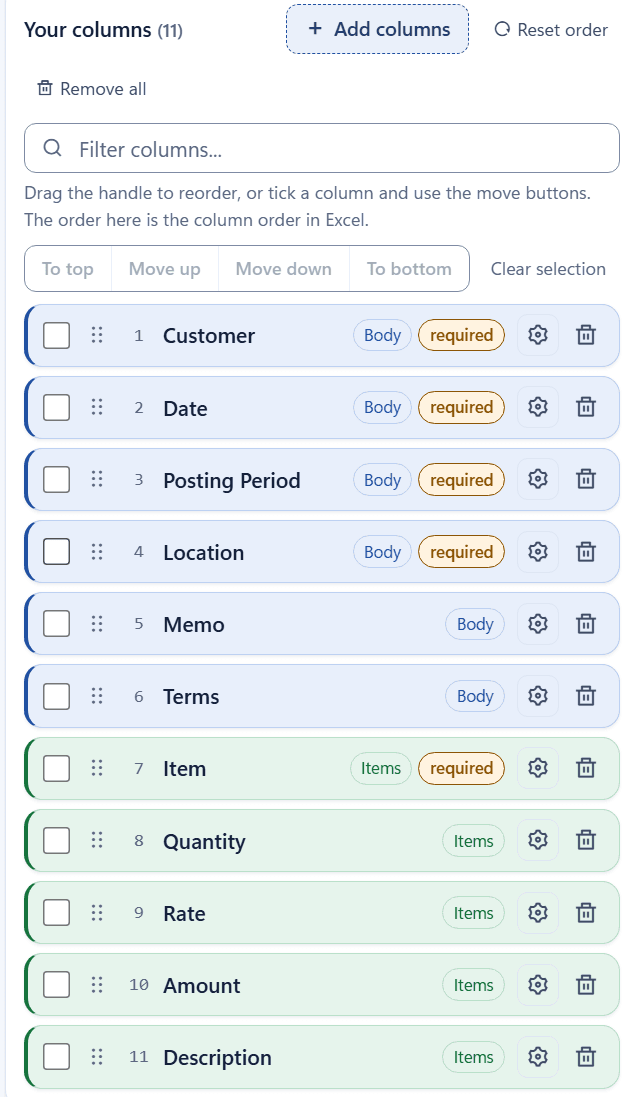
- On Filters, keep the recommended optional filters, with
tranDate(Date) preselected andentity(Customer) among them, and select Test filters. Every filter readsWorks. Then select + Add default filter, entercurrencyas the field, chooseany of, select Choose…, check US Dollar, select Apply, and select Test filter.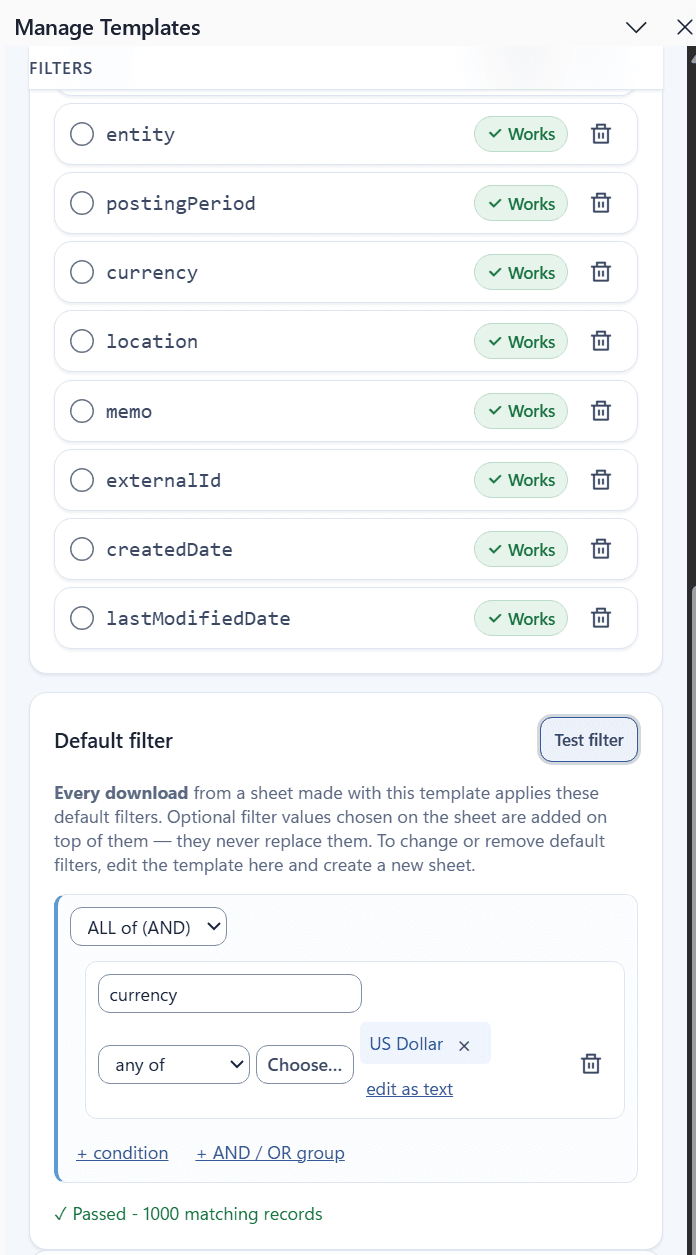
- On Dropdowns, Customer, Posting Period, and Item already use Finsyte lists. Terms is set to From NetSuite (fetch a table) with the source list
term: select Configure on Terms, then Fetch from NetSuite. Its status readsVerified — 6 options (all)or similar.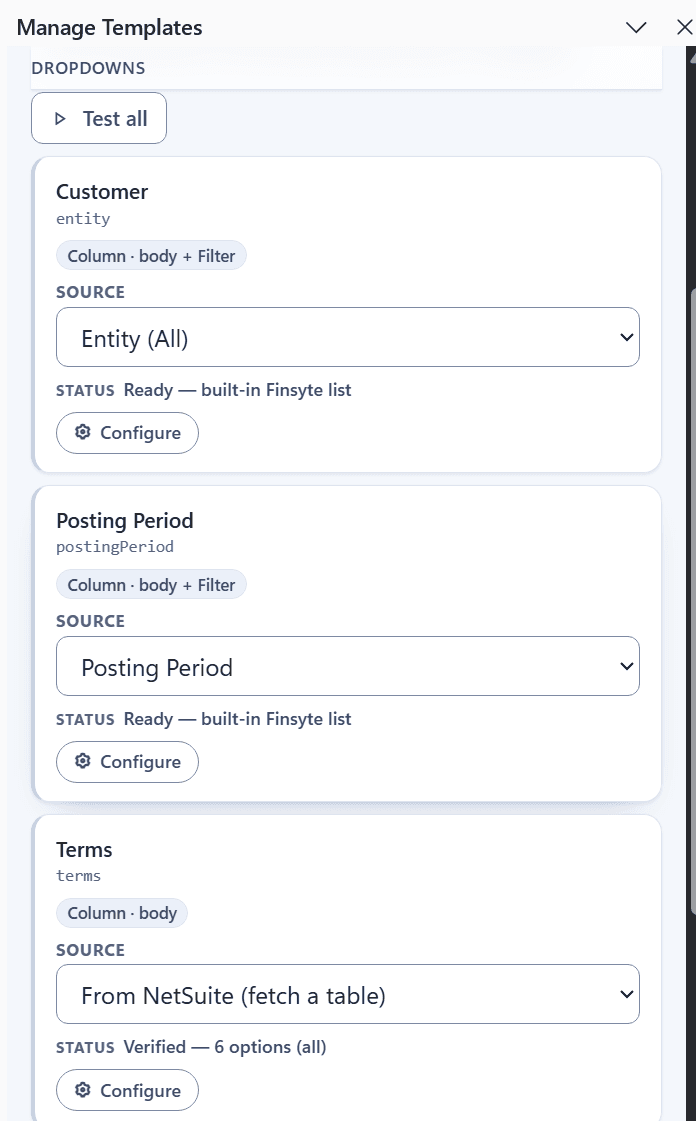
- On Review, confirm there are no warnings and select Save template.
Create Two Invoices
- Select Templates and Actions > Record Edit > Bulk Records > Invoice Templates > AR Invoices. A sheet named AR Invoices is added to the workbook. (When a record type has only one template, it is listed directly under the record type instead of in a submenu.)
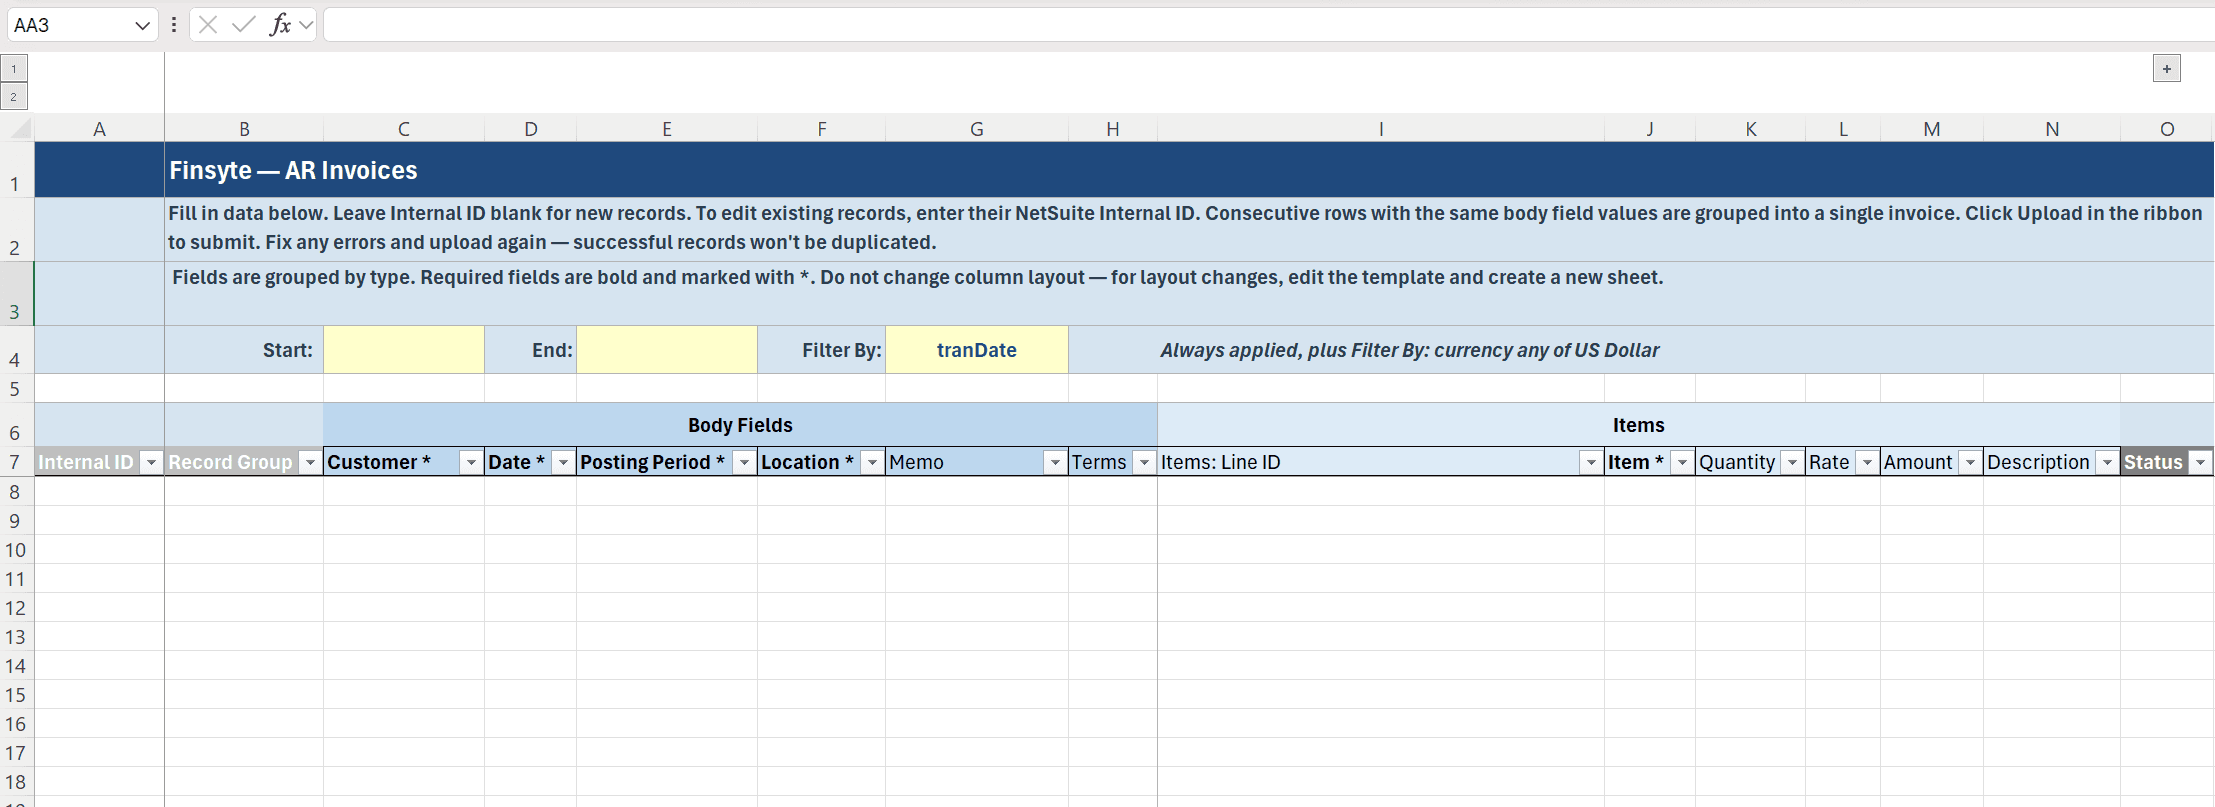
- Starting on row 8, enter the first invoice on two rows. Leave Internal ID and Items: Line ID blank, pick the same customer, date, posting period, location, and terms on both rows, and enter a different item, quantity, and rate on each row. If you use Record Group, enter
1in it on both rows. - Enter the second invoice on row 10 with a single item line, and
2in Record Group if you use it. Without Record Group, leave row 10 blank and start the second invoice on row 11, so it isn't read as another line of the first invoice.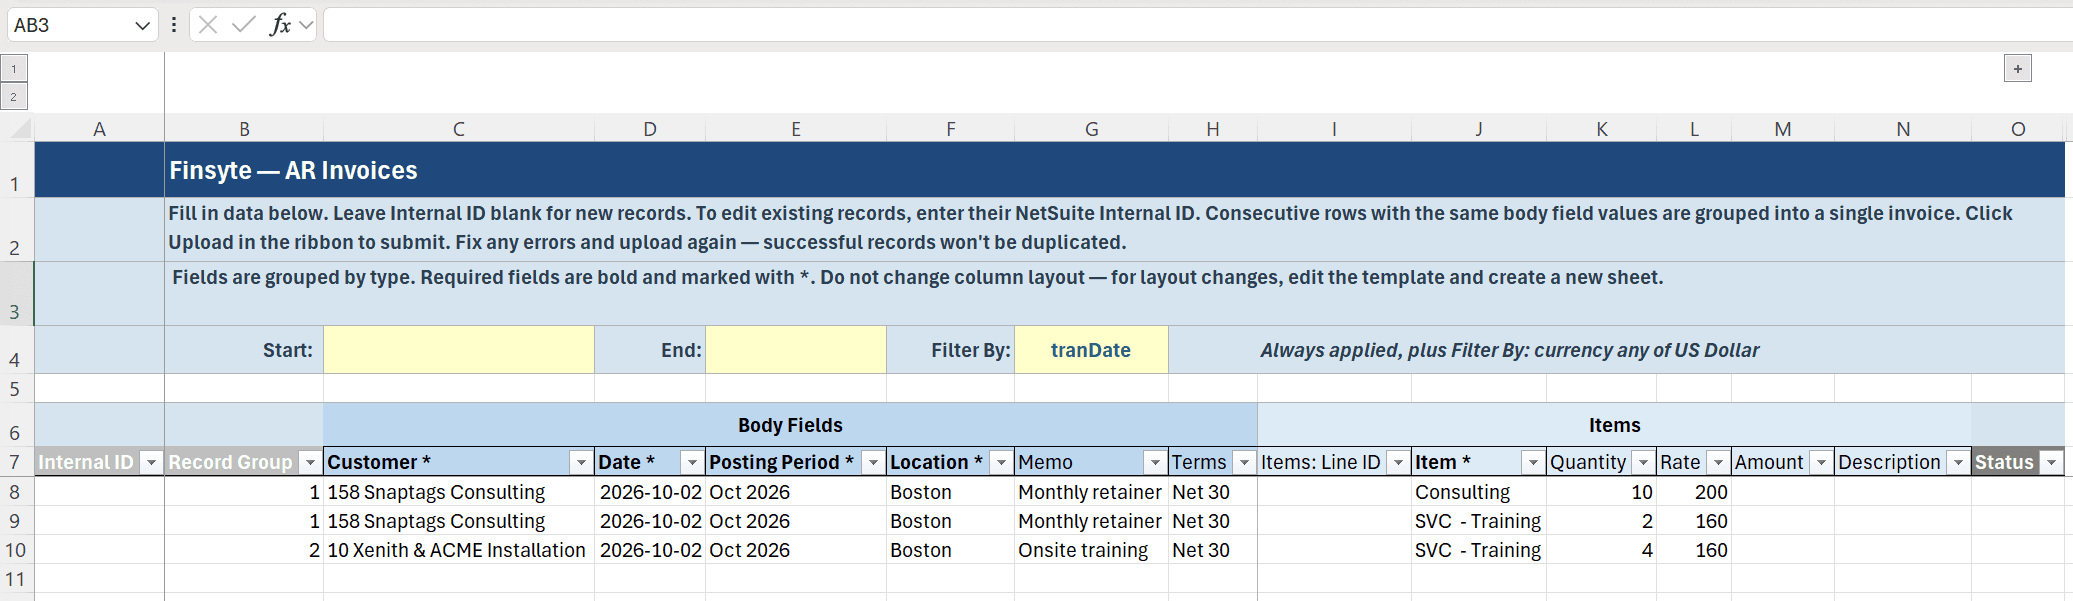
- Select Validate Sheet. The rows turn green, the Status column reads
Will create, and the banner readsValidation passed — no issues found. 2 to create, 0 to update, 0 unchanged.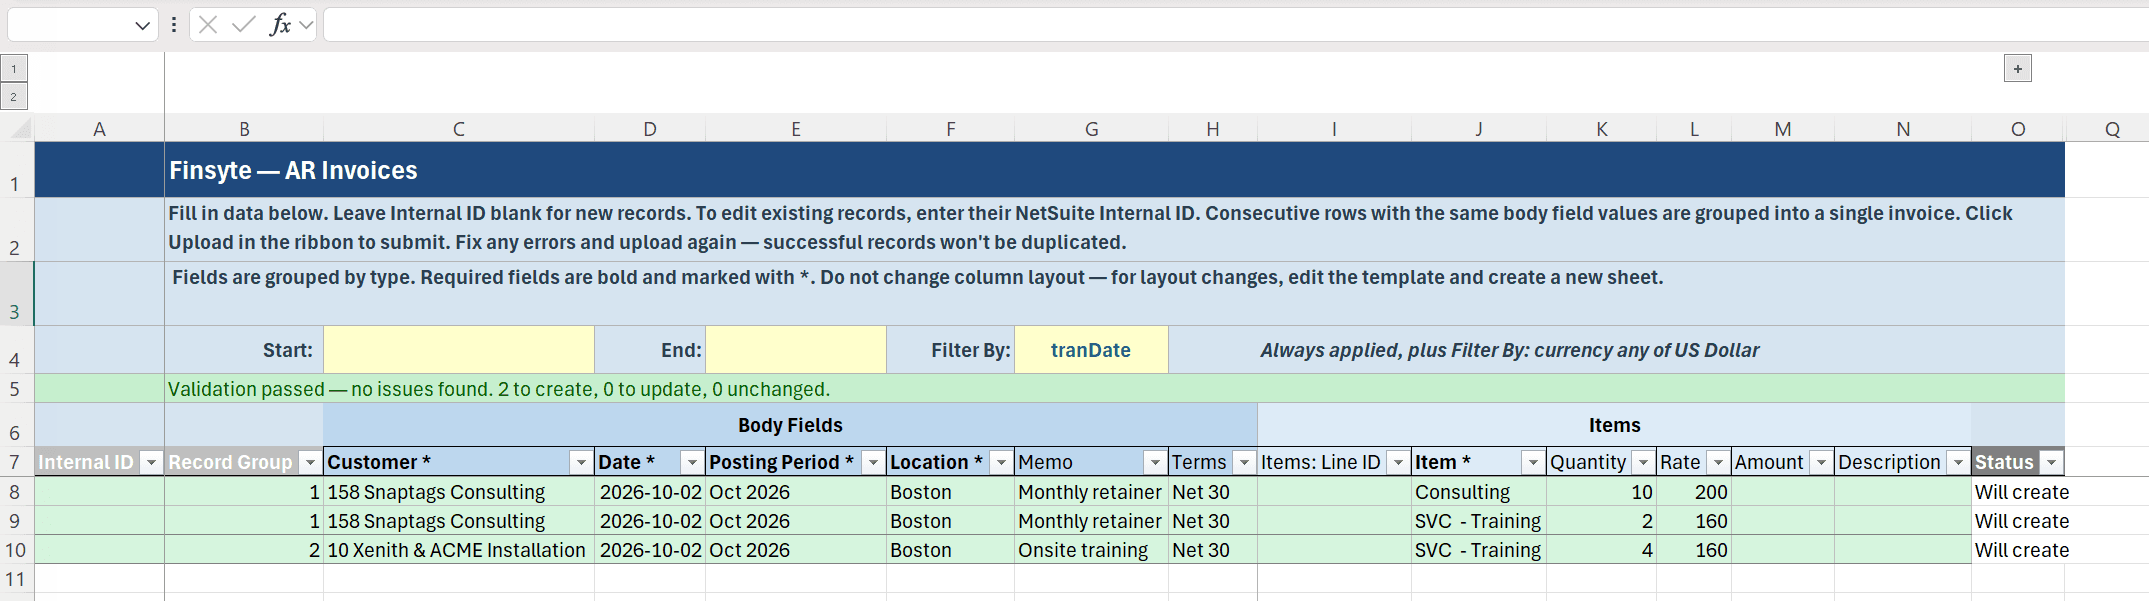
- Select Create. When the upload finishes, each row's Status reads
Created Invoiceand the new invoice number, for exampleCreated Invoice INV2017. The Internal ID and Items: Line ID columns are filled in, NetSuite's values such as Amount appear, and the banner readsUpload complete — Created: 2.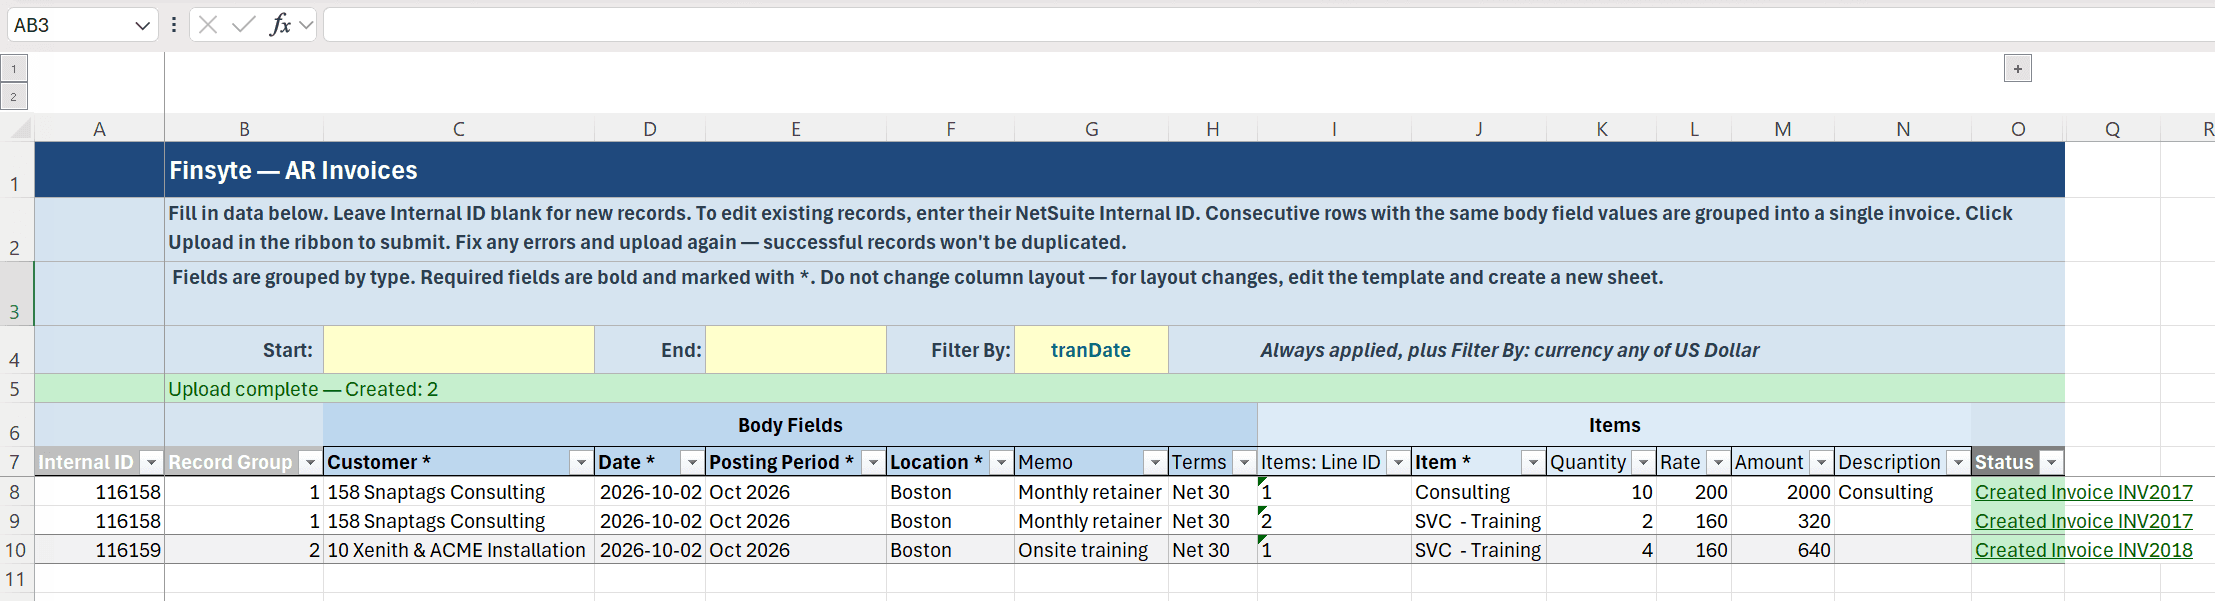
- Select a Status link to open the invoice in NetSuite.
Update an Invoice a Week Later
- Open the same sheet. With Filter By set to
tranDate(the transaction date), enter last Monday's date in Start and today's date in End, and select Download. Both invoices are downloaded, along with any other US dollar invoices from that week. If you use Record Group, each record's rows get a value such asGroup 1.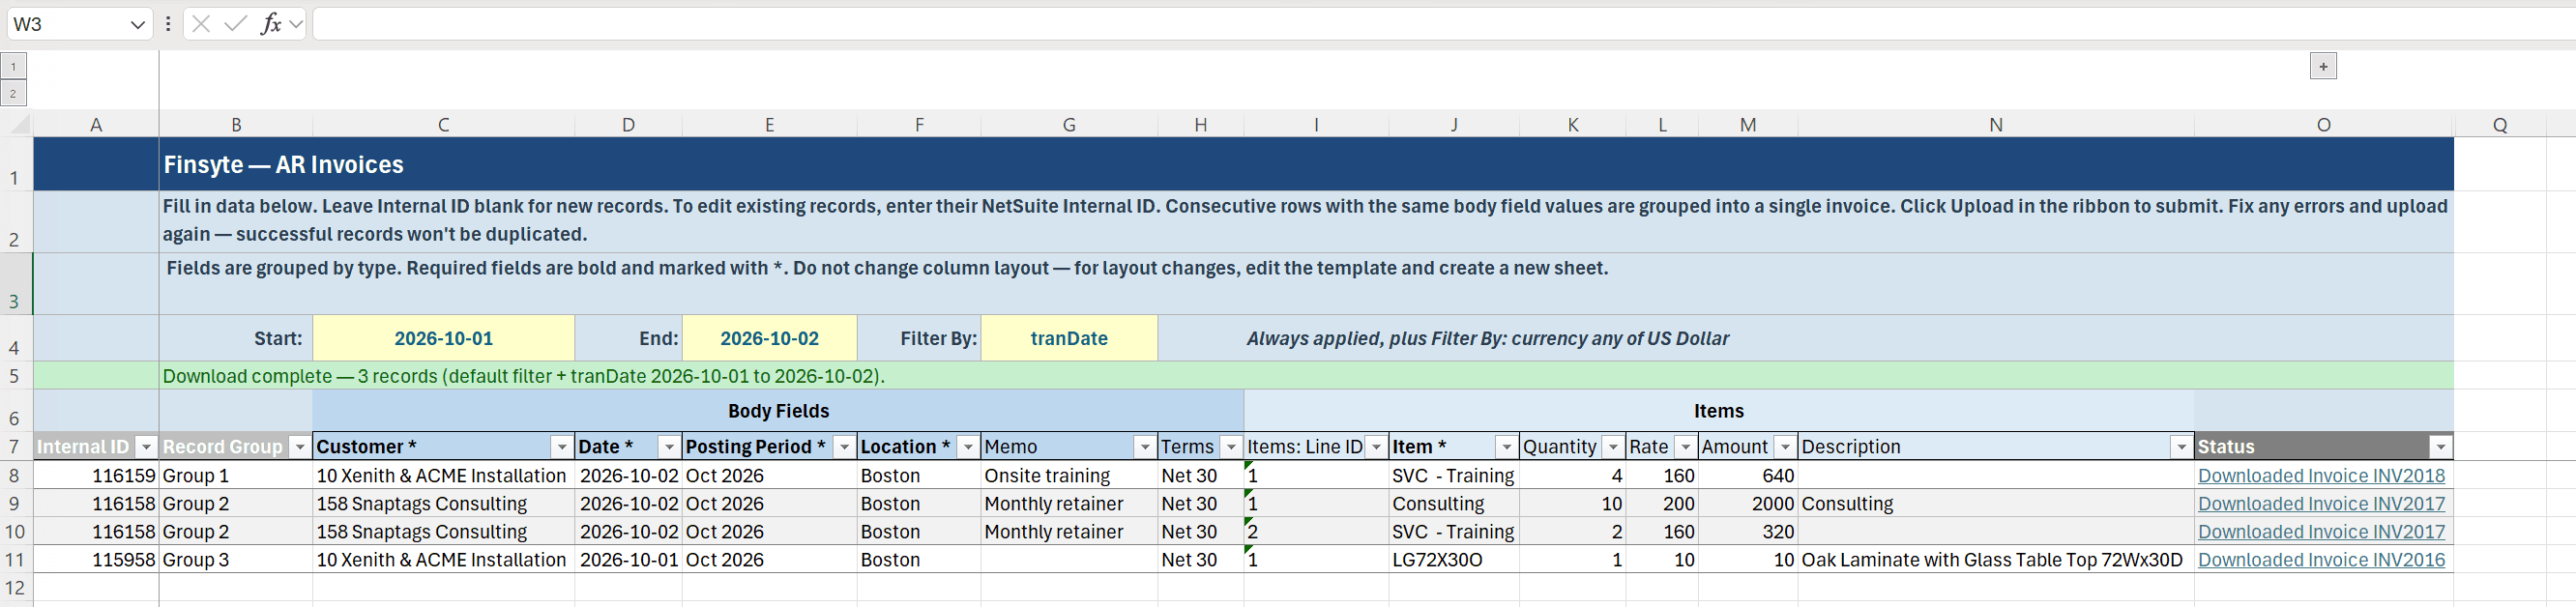
- Change the Quantity on the first line of INV2017. Keep its Items: Line ID.
- To add a line to INV2018, insert a row below its row, copy its Internal ID, body cells, and Record Group (if you use it) onto the new row, leave Items: Line ID blank, and fill in the new item, quantity, and rate.
- Select Add/Edit. INV2017 and INV2018 read
Updated Invoice …, every other record readsSkipped (no changes), the new line on INV2018 shows its new Items: Line ID, and the banner readsUpload complete — Updated: 2 | Skipped: N.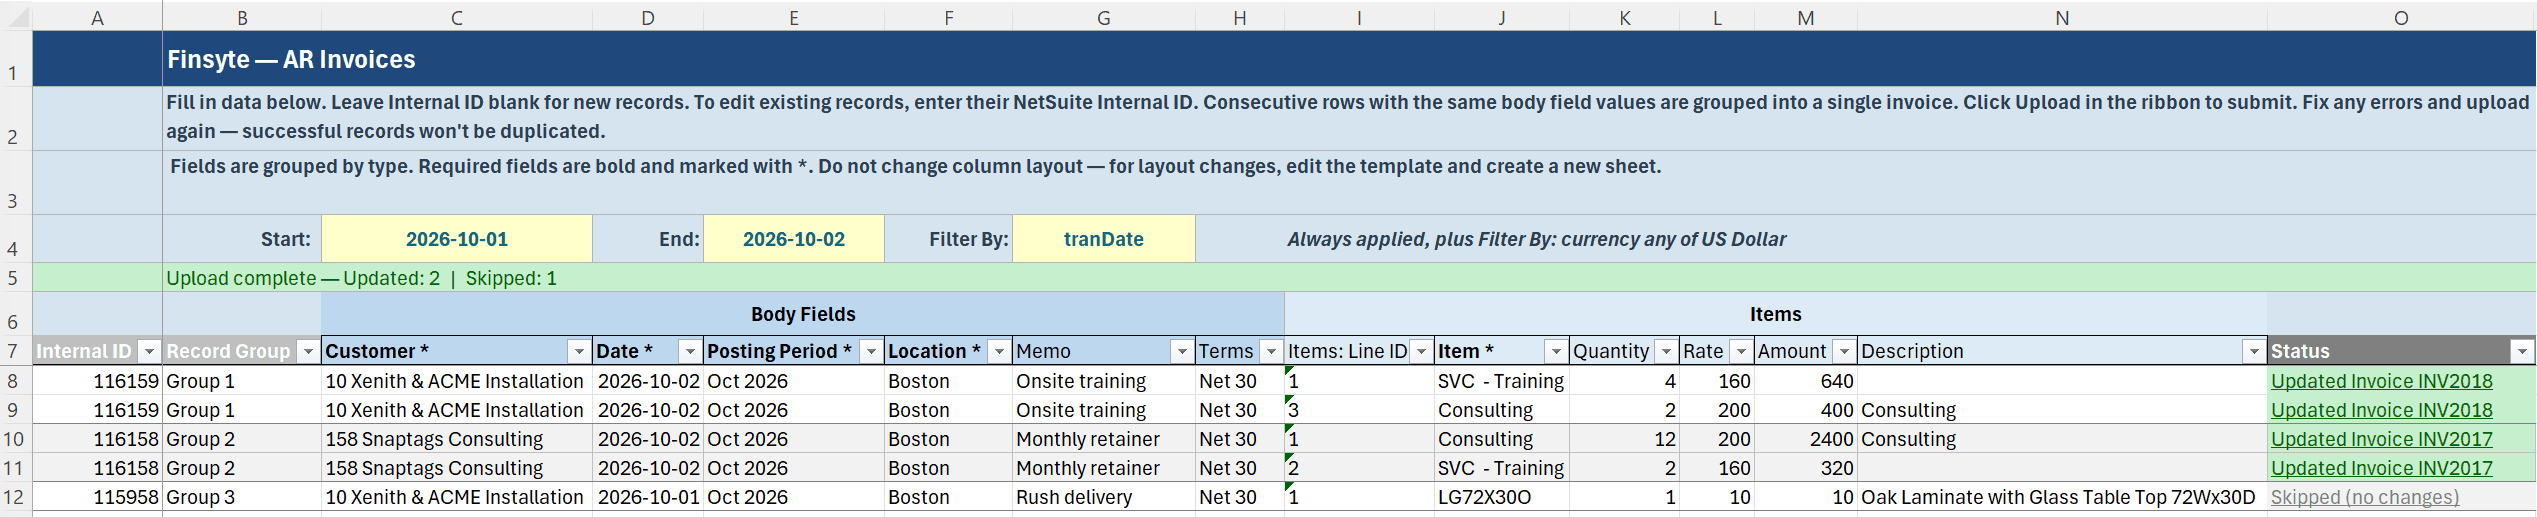
Save the workbook to reuse the sheet. Each time you download and upload from it, only the records you changed are sent.