Fill in the Sheet
Data rows start on row 8 of a bulk record sheet. Type values, paste them from another workbook, or download existing records and change them. This page covers what to enter in each kind of column and how rows are grouped into records.
New Records and Existing Records
The Internal ID column decides what happens to a row when you upload.
- Leave Internal ID blank to create a new record.
- To create a record from another transaction, such as a fulfillment from a sales order or a bill from a purchase order, also fill in its Created From cell. See Create Records From Another Transaction.
- To update an existing record, download it first and then change the cells you need to. Downloaded rows arrive with their Internal ID and every current value filled in, so only your changes are sent. Never type an Internal ID onto a blank row to edit a record: any column left empty clears that field in NetSuite, and because the row has no Line IDs, the record's existing lines are deleted. See Edit Existing Records.
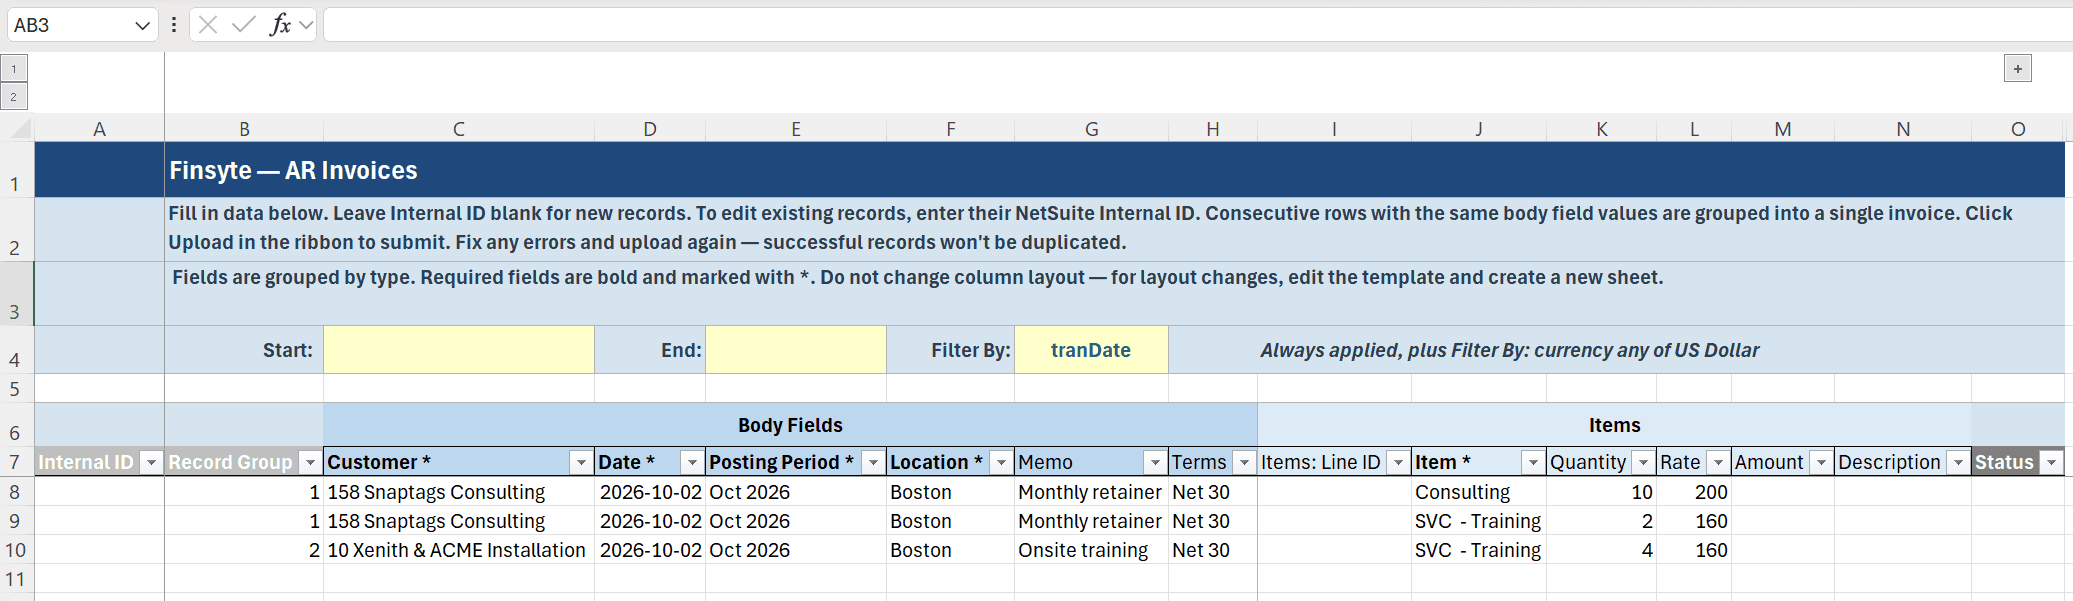
What to Enter in Each Column
| Column type | Enter | Notes |
|---|---|---|
| Text | Any text. | |
| Number | A number. | Integer columns accept whole numbers only. |
| Checkbox | true or false. | The column is text-formatted so Excel leaves the value as typed. |
| Date | A date in your NetSuite date format, or yyyy-mm-dd, or an Excel date. | Displayed as yyyy-mm-dd. |
| Date/Time | A date and time, for example 2026-03-15 14:30. | Interpreted in the sheet's Time Zone, shown on row 4. |
| List (dropdown) | Pick a name from the dropdown. | An internal ID also works. Enter id_ followed by the internal ID, for example id_42, to force a specific record when names are ambiguous. |
| Multi-select | Values separated by ^, for example East^West. |
Remarks
- A blank cell on a row that already exists in NetSuite clears that field when you upload.
- If the template gives a column a Default value, blank cells in that column receive it at upload.
- Values that are only reference information (columns marked read only in the template) are never sent.
Dropdown Columns
Columns whose template field has a list show an Excel dropdown. Values not on the list are rejected with an Excel alert, so pick from the list or enter an internal ID.
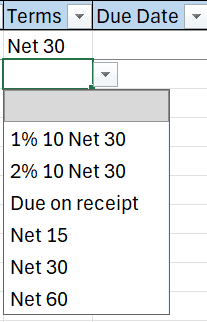
If pasting removes a dropdown, select the cells and choose the list from Data Retrieval > Dropdowns > Bulk Create Template to put it back. To take a dropdown off a range, use Productivity > Remove Dropdown.
Records With More Than One Row
For record types with lines, such as invoices, sales orders, and journal entries, each line is its own row. The header (body) fields are repeated on every row of the record, and the line fields differ from row to row. Lines of different sublists, such as a bill's item and expense lines, share rows side by side.
Each sublist also has a Line ID column, such as Items: Line ID, that holds NetSuite's ID for the line on that row. Leave it blank when you type new lines. See Work With Lines for how Line IDs decide which lines are kept, added, replaced, and deleted.
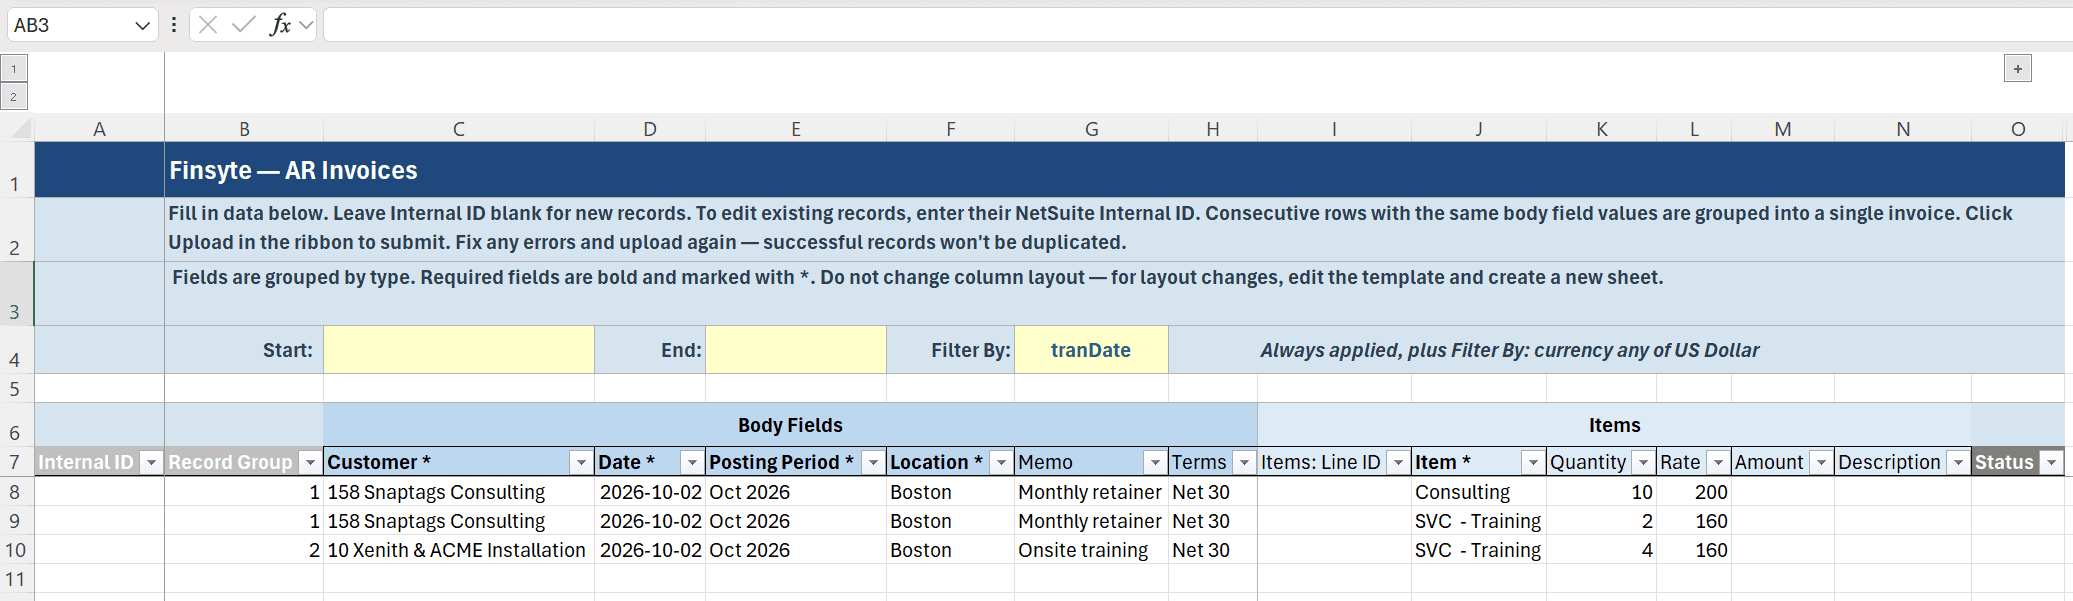
Finsyte decides which rows belong together in one of two ways.
- With a Record Group column (recommended): rows with the same Record Group value are one record. The rows do not have to be next to each other, and any value works, such as
1,2,3orINV-A,INV-B. - Without a Record Group column: consecutive rows with identical body field values are one record. Change any body value, or leave a blank row, to start a new record.
In both cases, rows that share a non-blank Internal ID are always treated as one record.
Remarks
- Body fields must be identical on every row of a record. If they differ, Validate Sheet flags the cells. For a new record the first row's value is used. For an existing record the record is withheld from upload until the rows agree.
- Every row of an existing record must carry its Internal ID. A row without it is read as a new record.
- Templates that include Inventory Assignment fields show each row of a line's inventory detail on its own sheet row. See Inventory Detail.
- To add, copy, replace, or delete lines on a downloaded record, follow the steps in Work With Lines.
Date/Time Columns and the Time Zone
Sheets with Date/Time columns show a Time Zone on row 4. Values you type are read in that zone and stored in NetSuite accordingly. The zone is stamped into the sheet when it is created, from the Override Computer Time Zone setting in General preferences or your computer's zone, and cannot be changed on the sheet. To work in a different time zone, change the preference and then create a new sheet from the template.

Tip: Run Validate Sheet before uploading. It catches names that are not on a list, dates in the wrong format, and missing required values without sending anything to NetSuite.
Next step: Download Records