Upload Files
Upload images, PDFs, and other files from your computer into NetSuite file fields, such as a customer's image or an expense report's receipts. Name the file in the field's cell, and when you upload, Finsyte saves it to NetSuite's File Cabinet and attaches it to the record.
Columns That Take a File
A column takes a file when its NetSuite field holds one, for example:
- Image on customers, employees, and vendors.
- Display Image and Thumbnail on items.
- Logos.
- Attach File on expense report lines, which holds the line's receipt. See Expense Report Receipts.
- Custom fields of type Document or Image.
Add them to the template like any other column.
Name the File
There are three ways to name a file in a cell.
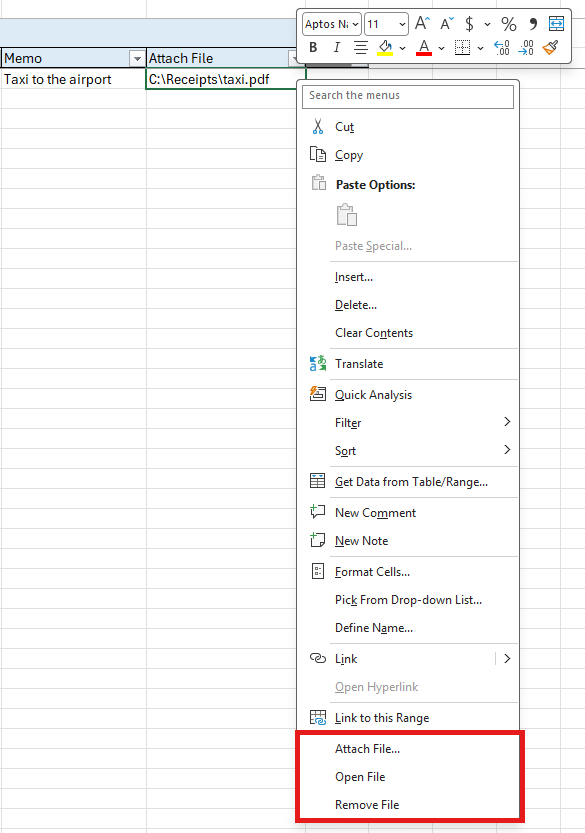
- Attach it: right-click the cell and select Attach File..., then pick the file. Its full path goes into the cell, replacing what the cell held.
- Type or paste its full path, such as
C:\Receipts\taxi.pdf. A path copied with File Explorer's Copy as path works as it is. - Type its name with its extension, such as
taxi.pdf. When you upload, you select the file. See Select the Files.
When two different files share a name, give each a path that includes its folder, such as Jan\scan.pdf and Feb\scan.pdf.
Pick a File Already in NetSuite
Some file fields can have a dropdown of the files in the File Cabinet, set up on the template's Dropdowns area. Pick a file from the dropdown, and the record links to that file in NetSuite.
To upload a new file in a column with a dropdown, leave the dropdown off the template by setting the field's Source to No dropdown, or remove it from the cells with Productivity > Remove Dropdown and type the file's name. Attach File... works either way.
You can also name a file in the File Cabinet by its internal ID: enter id_ followed by the ID, for example id_1234.
Select the Files
When cells name files without a full path, the upload asks for them in an Open dialog titled Select the files to upload, or open their folder and click Open. It lists the files the sheet names. Select them, or open the folder that holds them and select Open.
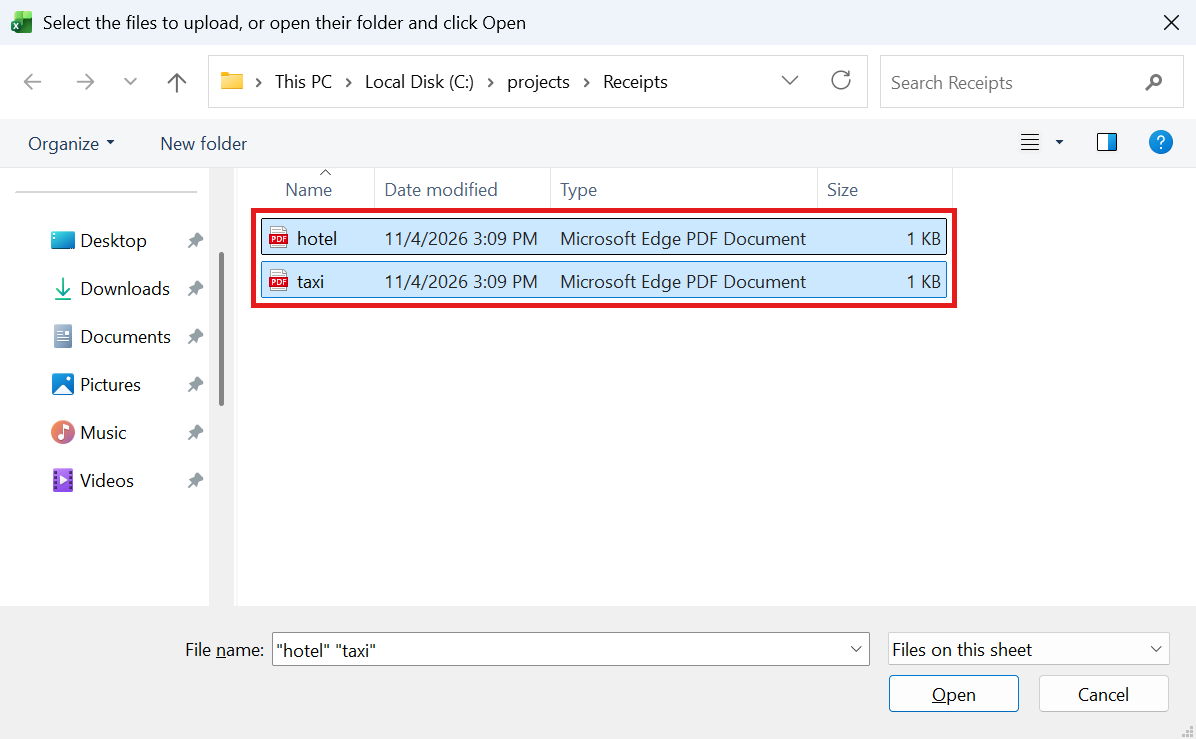
- The dialog opens in the workbook's folder. For a workbook saved to OneDrive or SharePoint, it opens in the folder you used last.
- Files can come from several folders. The dialog asks again for any files still to find, with their names in its title.
- A full path that leads to no file on this computer, such as one copied from a colleague's sheet, is asked for the same way.
- Select Cancel to stop the upload before anything is sent. The banner reads
Upload cancelled — nothing was sent.
Where Files Are Saved
Files are saved to the File upload location in Bulk Records preferences, by default the Finsyte Expense Receipts folder.
- Uploading the same file again reuses the copy already in the File Cabinet.
- A different file with the same name is saved with a number, such as
taxi (2).pdf.
Linked File Cells
After an upload or a download, a file cell shows the file's name, linked to the file in NetSuite. Hover over it to see Open the file in NetSuite, and select it to open the file.
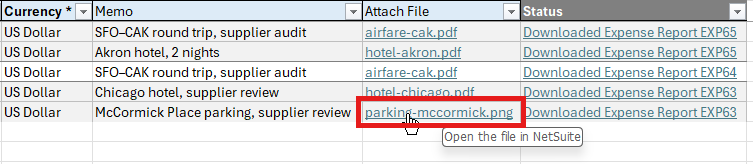
Linked cells are already in NetSuite, so the next upload leaves them as they are. A name typed over a linked cell is uploaded as a new file.
Replace or Remove a File
- Replace a file: attach a new one, or type its path or name over the cell, and upload.
- Remove a file: clear the cell and upload. The file comes off the record and stays in the File Cabinet.
On a cell that holds a path on this computer, the right-click menu also offers Open File, which opens a PDF or image, and Remove File, which empties the cell.
Expense Report Receipts
On expense report lines, the Attach File column holds each line's receipt, with the same right-click menu as any file cell: Attach File..., Open File, and Remove File. Open File also opens a receipt that's in NetSuite.
- Receipts can be PDFs or images: PDF, PNG, JPG, GIF, TIF, or BMP.
- Receipts are saved to the File upload location, or with Enhanced File Security on, to each employee's Expenses folder.
- Remove File on a receipt that's in NetSuite can also delete the file from NetSuite. The next upload deletes it once no expense report line uses it.
Remarks
- Attach files up to 10 MB each.
- Columns other than receipts take files of any type: images, PDFs, spreadsheets, and more.
- If a file can't be uploaded, hover over its cell for the reason, fix it, and upload again.
- Uploading files uses the Documents and Files permission on your NetSuite role.
Next step: Download Records