Delete Records
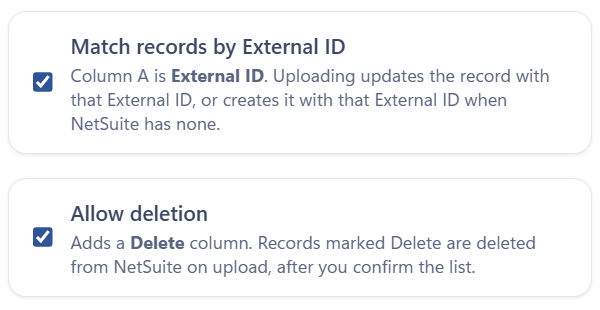
A template with Allow deletion adds a Delete column to the sheet. Mark a record Delete, upload, and confirm the list: Finsyte deletes the record from NetSuite and creates and updates the rest of the sheet as usual. Use it to clear out duplicates or records entered by mistake, many at a time.
Turn It On
- On the template's Basics area, check Allow deletion.
- Save the template.
- Create a new sheet from it. The Delete column follows Internal ID. Sheets created before the change keep their columns.
Mark Records to Delete
-
Download the records to delete.
-
In the Delete column, pick Delete on any row of the record. The whole record is deleted, with all its lines. To remove one line instead, delete its row. See Delete a Line.
-
Select Add/Edit.
-
Review the records listed in the confirmation, then select Delete and upload.
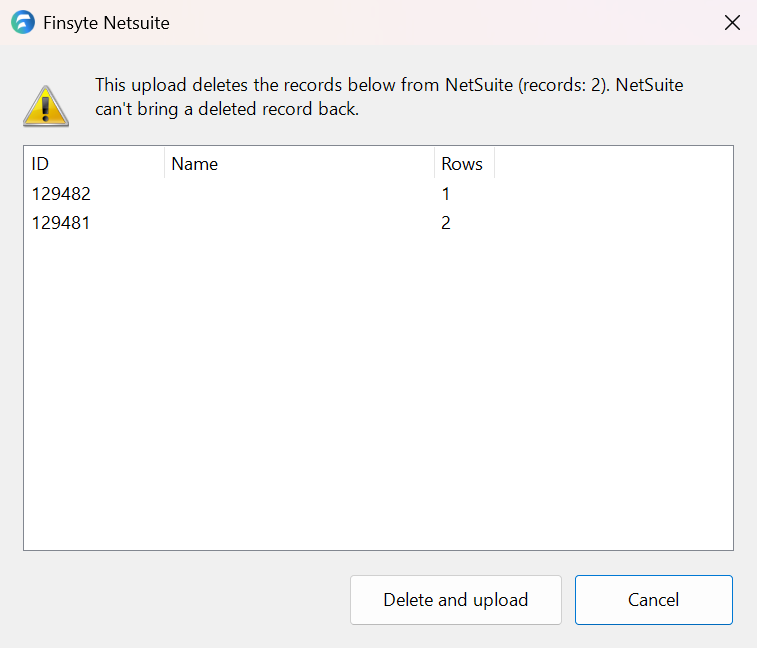
The confirmation reads This upload deletes the records below from NetSuite (records: N). NetSuite can't bring a deleted record back. It lists each record's ID, its Name (the record's name or number, when the template has a column for it), and its Rows. On a sheet that matches by External ID, it lists the External ID and Internal ID. When the upload also creates or updates records, it adds The other records on the sheet are created or updated as usual (records: N).
To stop, select Cancel. It is the default button, so Enter, Esc, and closing the window cancel too. Nothing is sent, including the creates and updates, and the banner reads Upload cancelled — nothing was sent.
Deletions are sent first, one record at a time, as Deleting <Record Type> <ID>, then the creates and updates. A larger upload still asks you to confirm its creates and updates after this list. See Upload Records.
After the Upload
- A deleted record's rows stay on the sheet. Its Status reads
Deleted <Record Type> <ID>, with no link, its Delete cells readDeleted, and its Line IDs are cleared. - Later uploads leave rows marked
Deletedas they are. The next download replaces them, as it replaces every row. - The banner counts deletions with the rest, for example
Upload complete — 2 created, 3 updated, 1 deleted. - When NetSuite has no record with that ID, because it was already deleted or the ID was mistyped, the record counts as deleted.
- When NetSuite keeps a record, for example
This company type cannot be deleted because the company has associated transactions., NetSuite's message shows in the Status cell and the banner, and the record stays as it was, with its link. Deletions run as your NetSuite role, so your role's permissions and closed periods apply the same as when you delete in NetSuite.
Recreate a Deleted Record
- On a sheet that matches by Internal ID: clear the record's Internal ID and upload. The record is created again with a new Internal ID, and its
Deletedmarks are cleared. - On a sheet that matches by External ID: clear the
Deletedmarks and the Internal ID, keep the External ID, and upload. The record is created again with that External ID.
Validate
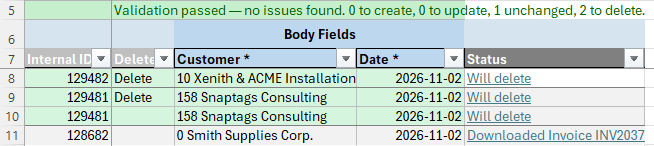
Validate Sheet shows Will delete in the Status of each record marked Delete, and the banner adds N to delete.
Remarks
- Give each record to delete an ID. A record marked Delete without one is held back, and its first row's ID cell reads
Marked Delete, but there's no Internal ID to delete it by.On a sheet that matches by External ID, it readsMarked Delete, but there's no External ID or Internal ID to delete it by. - To delete a record without downloading it, type its Internal ID and pick Delete on an empty row. A row with only the ID and Delete is enough. On a sheet that matches records by External ID, its External ID works too.
- Everyone who works on these sheets needs the current version of Finsyte. See Sheets From Older Versions.
Next step: Work With Lines