Upload Records
Uploading sends the sheet to NetSuite. Rows without an Internal ID are created as new records, and rows with one update the existing record.
Create or Add/Edit
The upload button in the Templates and Actions group reads Create while no row on the sheet has an Internal ID, and Add/Edit as soon as any row does. Both labels are the same action.

- Select Create or Add/Edit.
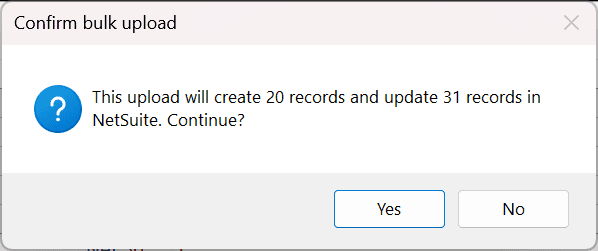
- For larger uploads, Finsyte asks you to confirm:
This upload will create N records and update M records in NetSuite, skipping K unchanged. Continue?Select Yes to proceed. Selecting No writesUpload cancelled — nothing was sent.to the banner. - The row 5 banner reads
Upload in progress — record X of Y…and the status dialog describes each step, such asCreating 25 Invoice records in one batch…orUpdating Invoice #1042.
Cancel an Upload
Select Cancel in the status dialog. Records not yet sent are marked Error: Cancelled. A batch that NetSuite has already accepted finishes on the NetSuite side, and those rows read Cancelled — batch completed in NetSuite; records may exist. Download the sheet again to see what was created.
Results
Each record succeeds or fails on its own. A failure never undoes records that succeeded.
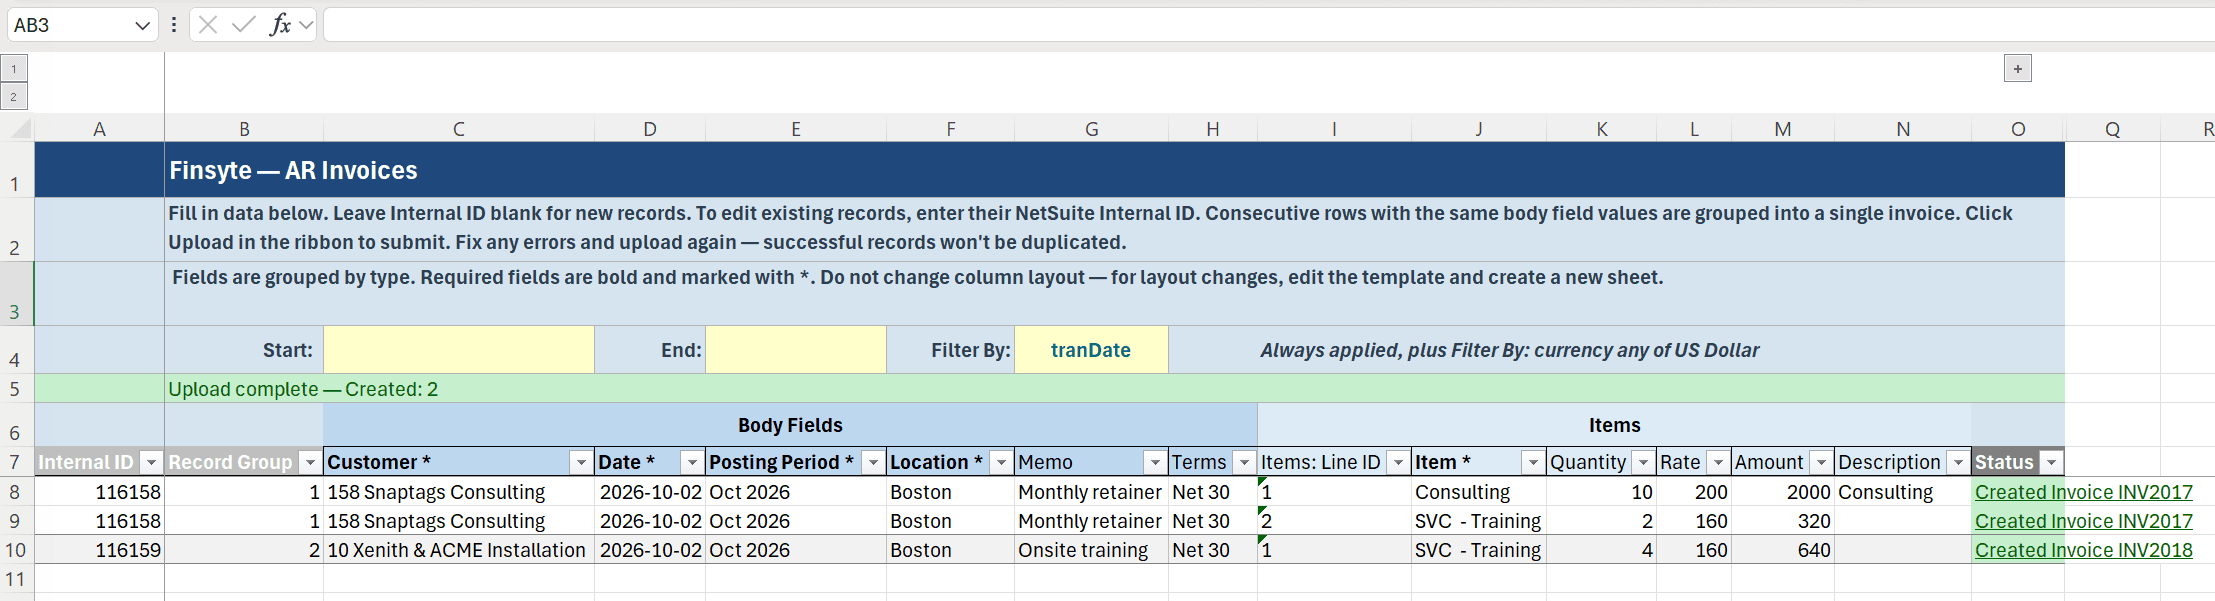
The Status column shows the outcome for every row, colored green, red, or grey, and linked to the record in NetSuite.
| Status | Meaning |
|---|---|
Created <Record Type> <number> | A new record was created. |
Updated <Record Type> <number> | The existing record was changed. |
Skipped (no changes) | Nothing on the row differed from NetSuite, so nothing was sent. |
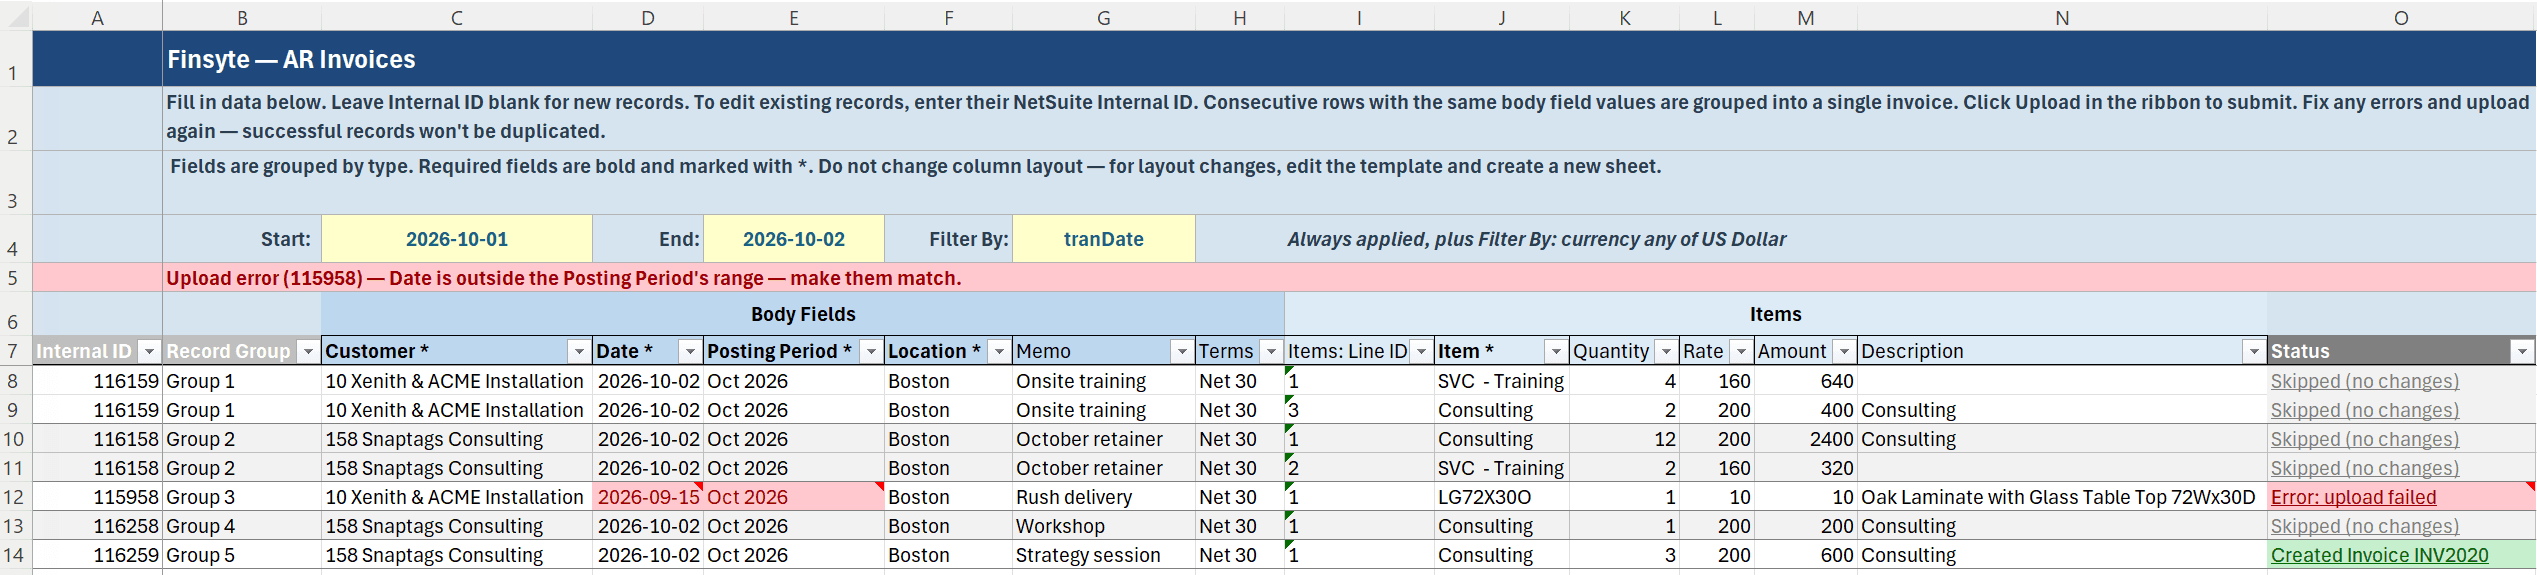
Error: upload failed | NetSuite rejected the record. Hover over the cell for the reason. See Upload Errors. |
Error: Skipped due to validation errors | The record was withheld because its rows conflicted. See Validate Sheet. |
Error: Cancelled | The record was not sent because you cancelled. |
The row 5 banner summarizes the run, for example Upload complete — Created: 12 | Updated: 4 | Skipped: 3. When records failed it reads Upload errors (N) — Internal IDs: … — hover each Status cell for its record's error, citing new records by row number. When only one record failed, it shows that record's message instead, for example Upload error (1042) — Date is outside the Posting Period's range — make them match.
After a Successful Upload
- New records get their Internal ID written into column A. The sheet is now an edit sheet for those records, and the button changes to Add/Edit.
- New lines get their Line ID, and new inventory assignment rows their Inventory Assignment: ID.
- Successful rows are refreshed from NetSuite, so you see any values NetSuite filled in or adjusted, such as document numbers, totals, or a default inventory detail. Lines appear in NetSuite's order, and a record gains or loses rows when NetSuite added or removed lines.
- If a record was saved but its rows could not be refreshed, its status ends with
— Line IDs could not be retrieved. Download this record again before making further changes.Download it again before changing it. - Uploading again sends only rows that changed. Records that succeeded are not duplicated, which is what the sheet's instruction row means by
Fix any errors and upload again — successful records won't be duplicated.
Remarks
- Multiple new records are sent to NetSuite in batches. Updates send only the fields that changed.
- Uploads run as your NetSuite role. A record you could not create or edit in NetSuite's own interface will be rejected here too.
Next step: Upload Errors