Open a Bulk Record Sheet
A bulk record sheet is a worksheet created from a template. This page shows how to create one and explains each part of it.
Create the Sheet
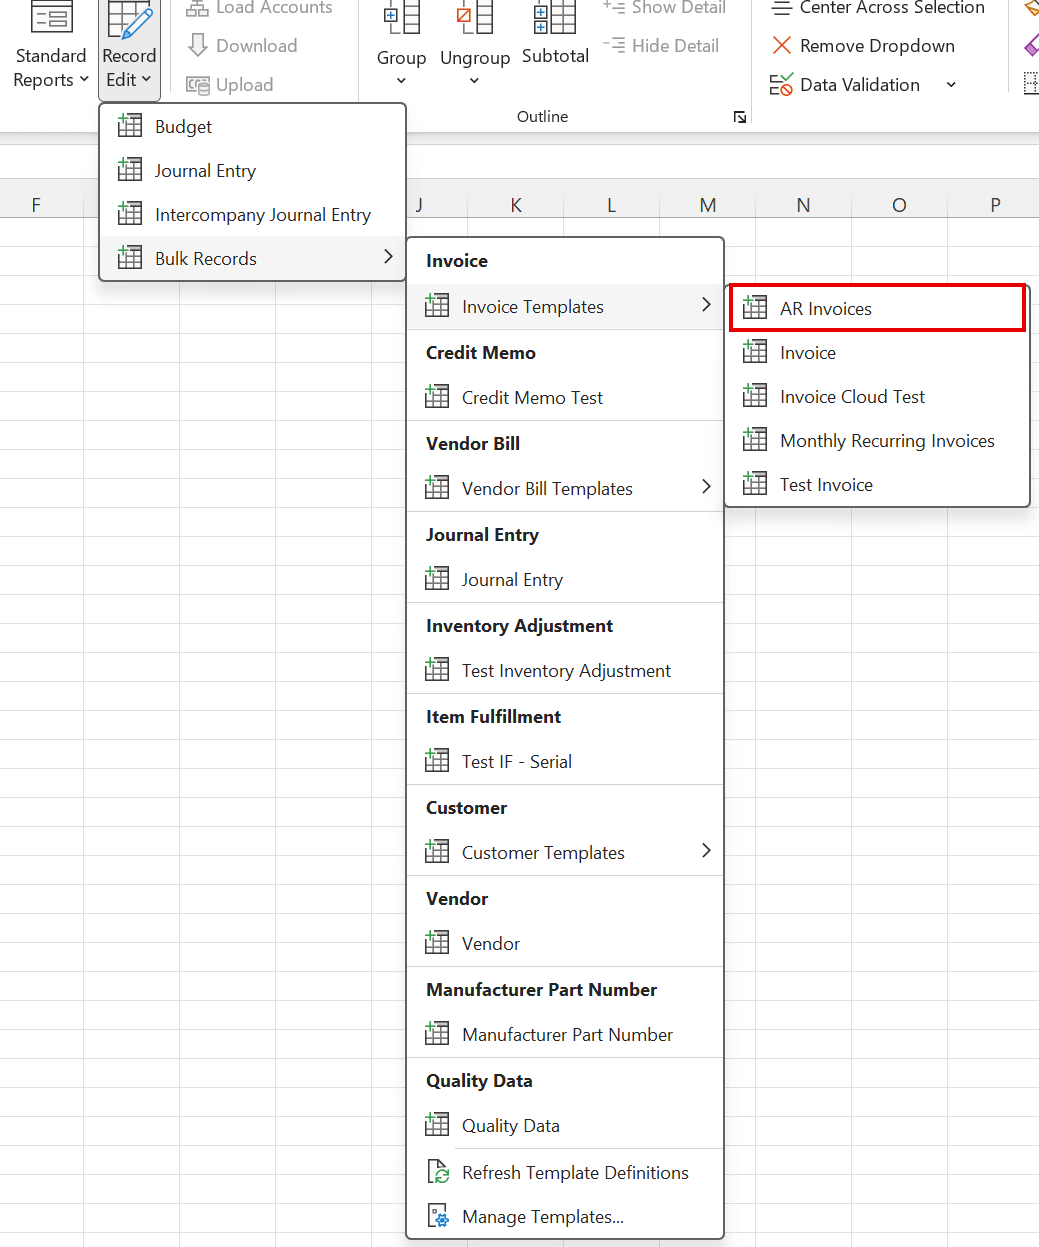
- Select Templates and Actions > Record Edit > Bulk Records.
- Under the record type heading, select the template. If the record type has several templates, open its <Record Type> Templates submenu first.
- A status dialog reads
Preparing <Template Name>...while Finsyte builds the sheet. The new worksheet is added at the end of the workbook and named after the template, for example AR Invoices. A second sheet from the same template is named AR Invoices 1, and so on.
Anatomy of the Sheet
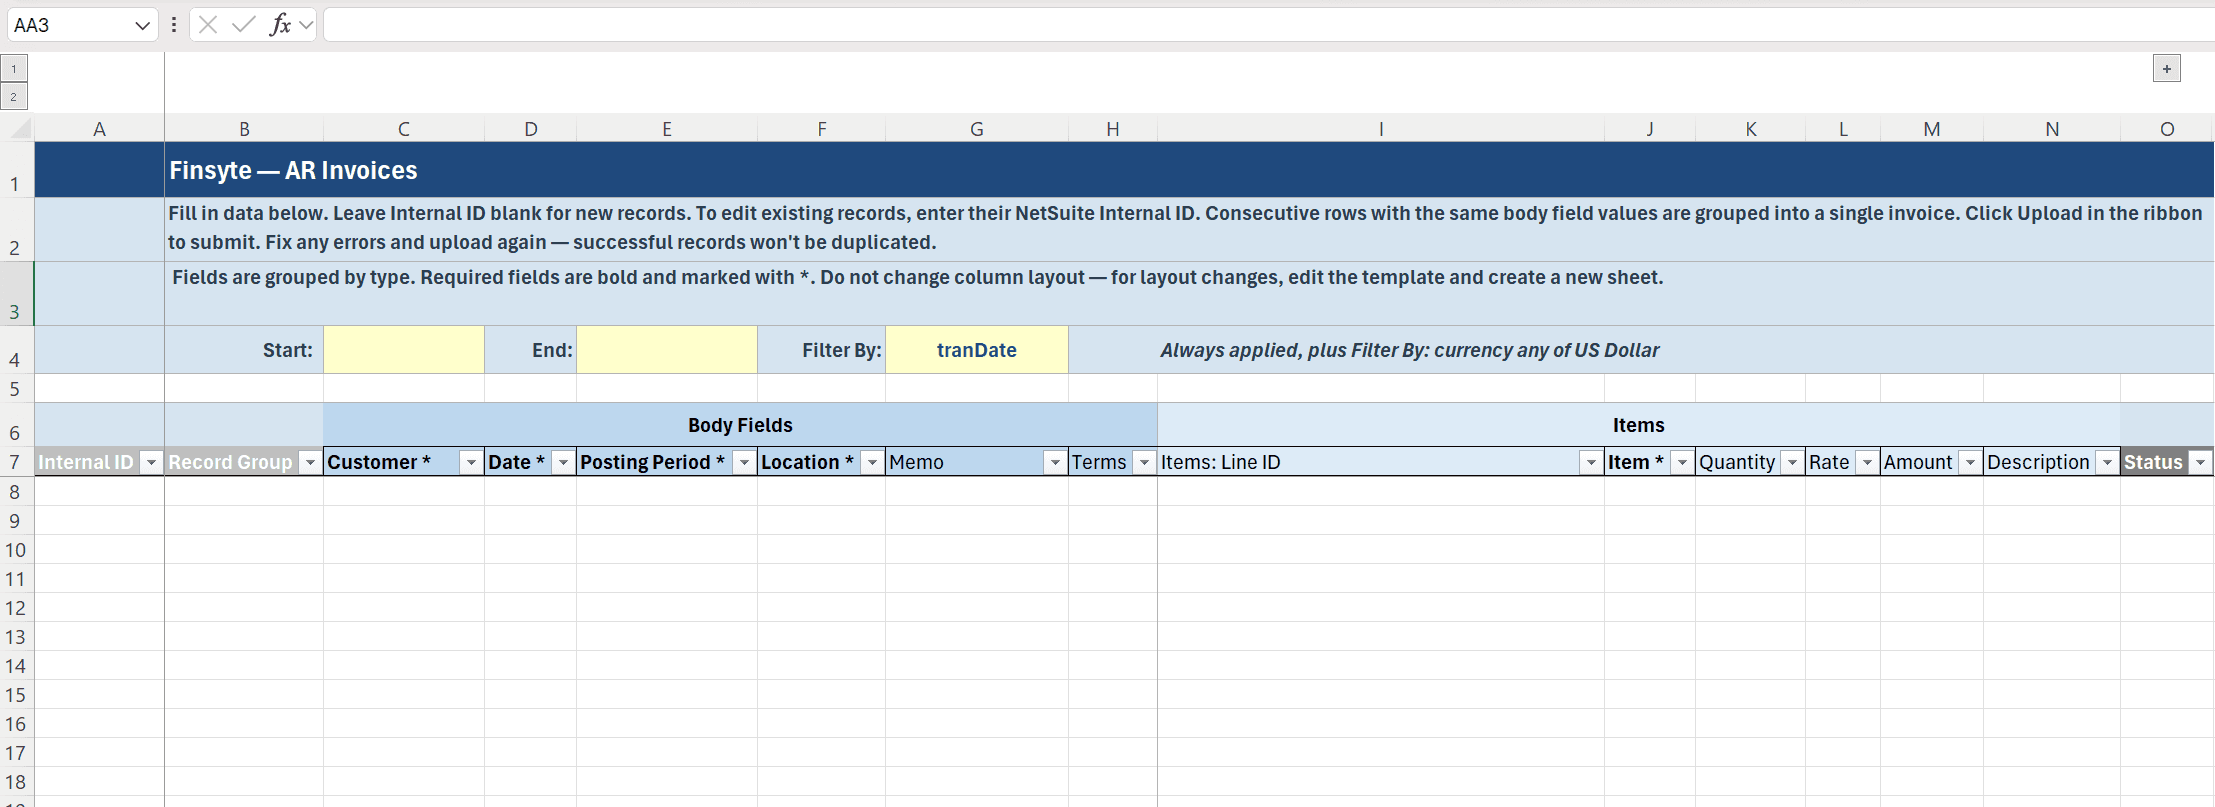
| Row | Contents |
|---|---|
| 1 | Title: Finsyte — <Template Name>. |
| 2 | Instructions for filling in the sheet. |
| 3 | Legend explaining how fields are grouped and marked. |
| 4 | Start, End, and Filter By cells used for downloading. If the template has Date/Time columns, a Time Zone cell follows them. If the template has a default filter, an italic summary of it appears at the end of the row. |
| 5 | Message banner. Finsyte writes the result of each download, validation, and upload here. |
| 6 | Section bars: Body Fields, then one bar per sublist such as Items or Expenses. |
| 7 | Column headers. Required columns are bold and end with an asterisk. |
| 8 and below | Data rows, one row per line. A line with several inventory assignment rows uses one row per assignment row. |
Fixed Columns
Every bulk record sheet has these columns in addition to the ones chosen in the template.
| Column | Purpose |
|---|---|
| Internal ID | Column A. Blank for a new record. Filled in by downloads and successful uploads, and tells Finsyte which existing record a row updates. |
| Record Group | Present only when the template has Include row grouping column checked. Rows with the same value belong to the same record. |
| <Sublist>: Line ID | One per sublist on the template, such as Items: Line ID or Expenses: Line ID, just left of that sublist's first column. Holds NetSuite's ID for the line on each row. Blank on new lines. See Work With Lines. |
| <Nested list>: ID | Present when the template has fields from a nested list, such as Inventory Assignment: ID next to the Inventory Assignment columns. Holds NetSuite's ID for each row of that list. See Inventory Detail. |
| Status | After the last data column. Shows the outcome of the most recent download, validation, or upload for that row, as a link to the record in NetSuite. |
| Checksum | Hidden and grouped at the far right. Finsyte uses it to detect which records have changes. Do not edit it. |
Set Up For You
- An AutoFilter is on the header row.
- Each column has the number format its field needs. Date columns show
yyyy-mm-dd, Date/Time columns showyyyy-mm-dd hh:mm, and text, checkbox, and list columns are text-formatted so Excel does not reinterpret what you type. - Columns with a list have a dropdown. See Fill in the Sheet.
- After a download, records are shaded in alternating bands so each record's rows are easy to see.
Warning: Do not insert, delete, or reorder columns, and do not change the Time Zone cell. Column positions are stored with the sheet, and changing them breaks uploads and downloads. To change the layout, edit the template and create a new sheet. Adding and deleting rows is fine.
Next step: Fill in the Sheet